Administration Guide
About this document
This document describes how to customize the configuration for the “itnetX ITSM Portal for System Center Service Manager”.
Security Settings
How to enable Forms Authentication
To enable forms authentication:
- Navigate to the ITSM Portal folder, by default
%SYSTEMDRIVE%\inetpub\SylianceITSMPortal\ - Open web.config for editing
- Find the following line
<authentication mode="Windows" /> - Comment this line using
<!--and-->tags:
<!-- <authentication mode="Windows" /> --> - Uncomment the lines (remove
<!--and-->tags) directly below as shown here:
<authentication mode="Forms" > <forms name=".ADAuthCookie" loginUrl="~/Auth/Logon" timeout="15" slidingExpiration="false" protection="All" /> </authentication> - Save changes in web.config
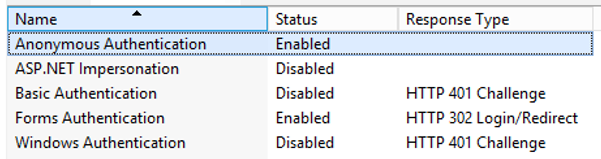
- Open Internet Information Services (IIS) Manager on the site server
- Navigate to Sites
- Select SylianceITSMPortal
- Double-click Authentication
- Disable Windows Authentication and ASP.NET Impersonation, enable Anonymous Authentication.
- Open browser and navigate to ITSM Portal.
SCSM Related Settings
How to change the SCSM management server name
To change the SCSM management server name after the initial installation:
- Navigate to the ITSM Portal folder, by default %SYSTEMDRIVE%\inetpub\SylianceITSMPortal\
- Open web.config for editing
Note: by default, this folder is protected by UAC. You must run your text editor with elevated permission (“Run as Administrator”) to edit this file. - Locate the following line (where the value depends on your initial configuration):
<add key="ScsmServerNameOrIP" value="scsmms01" /> - Change value attribute to new SCSM management server name or IP
Note: if the itnetX ITSM Portal is targeted to a management server located on another server or on a NLB cluster then Kerberos authentication must be configured. Please refer to Installation Guide for more details. - Save changes in web.config
How to change the status for cancelled Incidents and Service Requests
By default, when a user cancels an incident or a service request in the portal the status will be set to:
- Resolved for Incidents
- Cancelled for Service Requests
- Cancelled for Change Requests
Follow these steps to configure the status for cancelled requests:
- Navigate to the ITSM Portal folder, by default %SYSTEMDRIVE%\inetpub\SylianceITSMPortal\
- Open web.config for editing
Note: by default, this folder is protected by UAC. You must run your text editor with elevated permission (“Run as Administrator”) to edit this file. - For Service Requests locate the following line:
<add key="serviceRequestCancelStatusId" value="" /> - For Incidents locate the following line:
<add key="incidentCancelStatusId" value="" /> - For Change Requests locate the following line:
<add key="changeRequestCancelStatusId" value="" /> - Uncomment the line (remove
<!--and-->) - Set the value to the desired status ID
- Save changes in web.config
To find the status ID please run one of the following commands in Service Manager Shell:
- For Service Requests
Get-SCSMEnumeration ServiceRequestStatusEnum. | select Name, DisplayName, Id - For Incidents
Get-SCSMEnumeration IncidentStatusEnum. | select Name, DisplayName, Id - For Change Requests
Get-SCSMEnumeration ChangeStatusEnum. | select Name, DisplayName, Id
Service Catalog Settings
The itnetX ITSM Portal allows you to take advanced control over request offerings. The following settings can be configured:
- Open request offerings directly
- Insert a page break before a question and set the page title
- Prevent automatic preloading for the query result picker
- Show query results automatically
- Use custom relationships in query results
- Configure prompt layout, constraints and default values
- Set the default number of questions per page
- Display questions in repeating tables
- Add show/hide conditions to questions
- Map object properties to prompts
- Use Linking Activities (Form Filling Activities and Checklist Activities)
- Display icons for Configuration Items
- Include information about the client computer in the request
- Enabling the Plain Service Catalog View
Creating a new Request Offering in the SCSM Console
The itnetX ITSM Portal now allows the administrator to create request offerings via the console using the new Request Offering Editor.
To create a new request offering:
- Launch the SCSM console
- Navigate to Library\Service Catalog\Request Offerings
- Under this node there are, by default, 4 views: All Request Offerings; Draft Request Offerings; Published Request Offerings; Standalone Request Offerings
a. All Request Offerings
b. Draft Request Offerings – not yet published, not visible in Portal
c. Published Request Offerings – published, visible in Portal when added to a published Service Offering
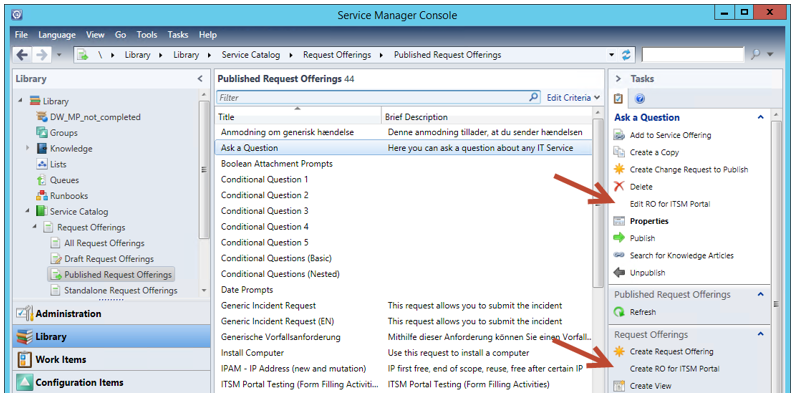
d. Standalone Request Offerings – published or unpublished but not associated with any Service Offering, not visible in Portal but can be linked to directly via URL - In Task Pane click Create RO for ITSM Portal
- Provide Title and Description, choose a Template for the offering and the management Pack to save it in.
- Configure the desired user prompts. Each prompt can be configured as Required, Optional or Display Only. Possible Prompt Types are:
a. Date
b. Decimal
c. File Attachment
d. Integer
e. MP Enumeration List
f. Query Results
g. Simple List
h. Text
i. True/False - In the Layout section of the wizard you can configure the prompts into Pages by adding Page Breaks, add Repeating Tables for prompts, set condition satisfactions for showing/hiding prompts.
- In the Configure Prompts section you can set constraints and defaults values for any of the above prompt types.
- In the Map Prompts section you can map object properties to prompt outputs, where allowed this can be a multiple mapping.
- Existing Knowledge Articles can be linked to the offering
- Publishing and Service Request association can be made in the last steps of the wizard
- Click Create in the Summary and check status in the Completion page.
- Close the wizard.
Creating Request Offerings for Change Requests
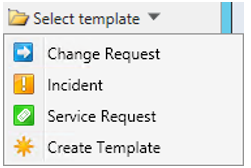
ITSM Portal allows you to create request offerings which are mapped to a Change Request template. Do create a request offering for a Change Request, click Create RO for ITSM Portal, and then select the Change Request template type from the Select template picker on the General tab
You can only create request offerings based on Change Request templates that you created manually in the SCSM console. The out-of-box standard change request templates will not work.
Hide standard Create Request Offering and Properties tasks
If you are using the Advanced Request Offering Editor (Create/Edit RO for ITSM Portal) then you can hide the default Create Request Offering and Properties tasks. To do this, import the Syliance.ITSMPortalSupporting.TasksConfig.xml management pack located in the \Docs folder on the ITSM Portal server.
Editing Request Offerings in the SCSM Console
- Select the request offering and in the right-hand task pane click “Edit RO for ITSM Portal”.
- If “Edit RO for ITSM Portal” is the standard action for the selected item then it will be displayed bold in the task pane. This means double-clicking on the selected item will launch “Edit RO for ITSM Portal”.
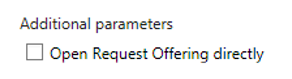
Open Request Offering directly option
By default, users must perform three clicks to open the form: select Service Offering, select Request Offering and then press Create Request button. You can decrease this sequence to two clicks by enabling the option Open Request Offering directly. If enabled, then the user must select Service Offering, and when he clicks on the Request Offering the form will be loaded directly.
This option can be enabled or disabled for each Request Offering separately.
To enable or disable this option:
- Either create a new RO for ITSM Portal or edit an existing RO as described above.
- In the general section, check or uncheck the option Open Request Offering directly
Note: You can further reduce the number of clicks required to open a Request Offering form to one single click by enabling the Plain Service Catalog View. This is explained in chapter Plain Service Catalog
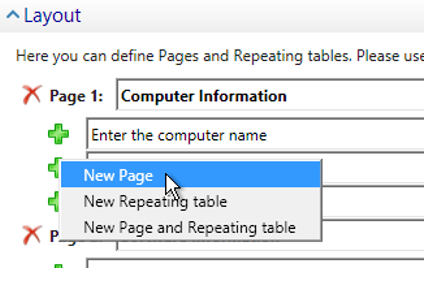
Insert a page break before a question and set the page title
To insert a custom page break before a question and optionally set the page title:
- Either create a new RO for ITSM Portal or edit an existing RO as described above.
- In the layout section click on the green Plus icon next to the prompt and select New Page.
- Enter a title for the new page.
Additional settings for Query Result
ITSM Portal allows you to extend the standard behavior of the Query Result with a lot of new features and options.
Prevent automatic preloading for the query result picker
By default, the query result picker preloads data from the CMDB when the request offering page is opened. This can cause long loading times when the query result returns many results. Follow these steps to prevent this behavior:
- Launch the SCSM console
- Navigate to Library\Service Catalog\Request Offerings
- Open the desired Request Offering for editing using “Edit RO for ITSM Portal”
- Scroll down to Configure Prompts section
- Select the Query Result type prompt and click Advanced Configuration.
- Check the checkbox “Do not preload results (user must type something to search)”
- Click OK twice to exit the RO Editor.
When preloading of query results is prevented, the user must begin to type in the search box and press the Search button (or the Enter key) to load data from the CMDB. This is useful for large tables.
Show query results automatically
By default, the query result picker is collapsed even if the results are already loaded. To show the query results automatically:
- Click Advanced Configuration
- Check the checkbox “Expand results by default”
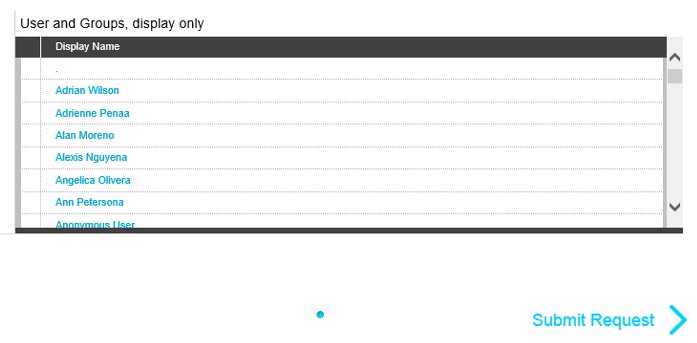
Hide search bar
By default, the query result picker contains a search bar. With this bar you can expand\collapse result view and perform the search. In case when the “Show query results automatically” option is enabled, or when you are using query results in “Display Only” mode, the search bar can be unnecessary. In this case you can hide it.
To hide the search bar:
- Click Advanced Configuration
- Check the checkbox “Hide search bar”
Query Result will look like this:
Use custom relationship in query results
By default, you can map selected objects in query results on only two relationships: Affected Configuration Items and Related Configuration Items. To map selected objects to any relationships (including your custom relationships):
- Launch the SCSM console
- Navigate to Library\Service Catalog\Request Offerings
- Open the desired Request Offering for editing using “Edit RO for ITSM Portal”
- Scroll down to Configure Prompts section
- Select a prompt of Query Result type and click Advanced Configuration
- Check Add object as related items with custom relationship, select the object template, select the relationship and press the Add button
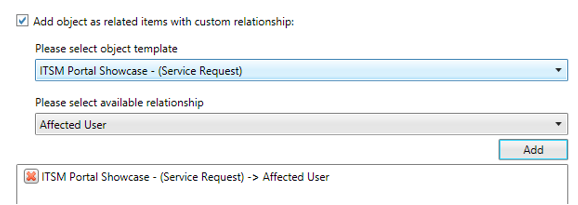
- To remove the mapping press the
 button
The relationship Reviewer is the special case. It is always displayed for Review Activities and will be handled as two relationships: RA 🡢 Reviewer 🡢 ReviewerIsUser. This allows to add Query Result selection as Reviewers to Review Activities.
Add objects to User Input and target relationship
This option available only if Query Result is in Display Only mode. If it disabled, then object(s) from Query Picker will not be added to request. This is very helpful is you need just to display some data for user or use them as token (current user, for instance).
If “Add objects to User Input and target relationship” disabled then selection not visible on the portal:
We suggest to use option “Show query results automatically” in this case to display data.
To change the “Add objects to User Input and target relationship” option:
- Click Advanced Configuration
- Check or uncheck the checkbox “Add objects to User Input and target relationship”
Use current user as default selection for Query Result
By default, no objects are selected in Query Result. If your Query Result based on User class or any derivedclasses\combination classes, then you can user current logged on user as default selection. This option doesn’t work if “Prevent automatic preloading for the query result picker” option enabled.
To change the “Use current user as default selection for Query Result” option:
- Click Advanced Configuration
- Check or uncheck the checkbox “Set user logged on to portal as default value (only for User class)”
Configure prompt layout, constraints and default values
To configure the prompts:
- Launch the SCSM console
- Navigate to Library\Service Catalog\Request Offerings
- Open the desired Request Offering for editing using “Edit RO for ITSM Portal”
- Scroll down to Configure Prompts section
- Select a prompt and click Configure or Advanced Configuration (for Query Result type).
Display single line and multiline text boxes
For questions of type text, you can define the type of the text box: single line or multiline. The single line text box is used only if the total length constraint of the question is less than or equal to 256 chars. In all other cases the multiline text box is used.
The total length constraint is calculated based on the question’s length constraints and the length of the mapped field:
- If the question’s length constraints are set then this value is used to select the type of text box to display. For instance, for the configuration shown below, the single line text box is used:
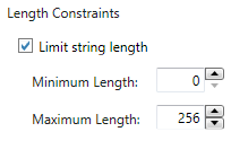
- The minimum length of all mapped fields is used to select the type of text box to display. For instance, if the question is mapped to the Title and Description fields of the Incident class then a single line text box is used, because the maximum length for the Title property of the Incident class is 256.
- The minimum values of step 1 and step 2 are used to finalize selection of the type of text box.
Define prompt constraints
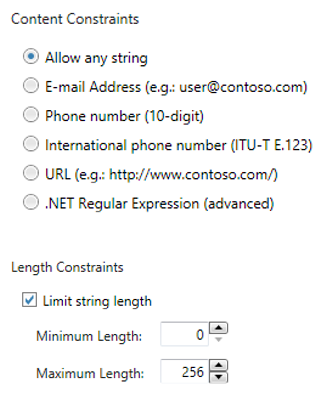
The ITSM Portal allows you to set constraints for questions of type:
- Text
- Date
- Integer
- Decimal
- File Attachment
To define prompt constraints:
- In Configure, select which constraints to apply to the text prompt input.
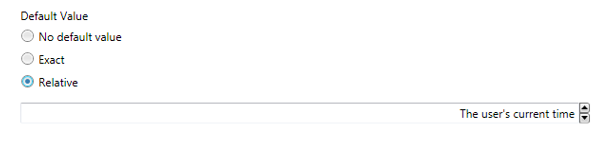
- Date prompts can be constrained to date ranges, either set as a specific range or dynamically using the user’s current time.
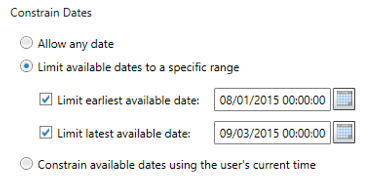
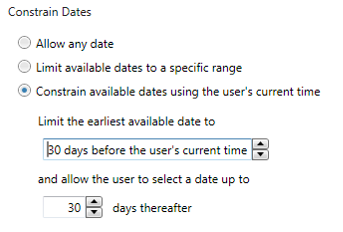
Note: For Date prompts a Time Picker is also available
- Integer and Decimal prompts can be constrained to ranges
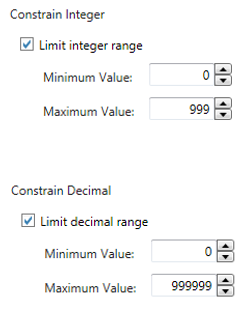
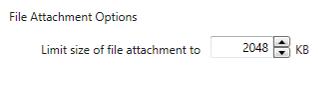
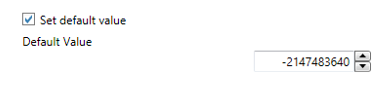
Note: The Minimum and Maximum Values for integers are-2147483648and2147483647respectively. - File attachment size can be restricted.
Setting the default value
The ITSM Portal allows you to set the default value for questions of type: * Text * Date * Integer * Decimal * MP Enumeration List * Simple List * Boolean(True/False)
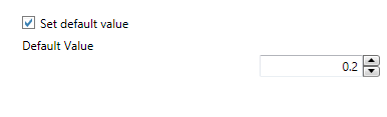
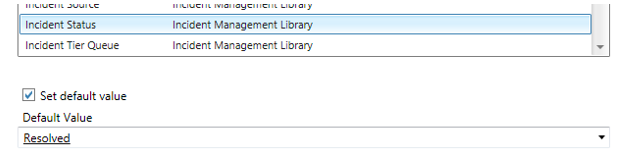
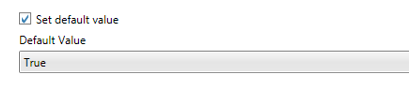
- In Configure, check the checkbox to set the default value
Text can be any string.

Date can be an exact date or relative to user’s current time.
Integer can be any valid whole number (minimum and maximum values for integers apply)
Decimal can be any decimal number.
MP Enumeration List can be selected from available enumerations
Simple List

Boolean
In addition, you can use a URL parameter to set the default value for any given question. To set the default value please add “question#=value” to the URL, where # is the number of the question, starting from 1, For example:
http://portal/ServiceCatalog/CreateNewRequest?roId=0edb1d3e-a615-3f8f-8262-a2069a86d77b&srId=e44a31de-1799-74a9-316e-0b19e262e00c&question1=default
Control the behavior of child items in MP enumerations
You can control the behavior of questions which are bound to MP Enumeration Lists when it comes to child enumeration items.
You can prevent the user from clicking an item in the list which has children. When enabling this option, the user will have to select a leave element in the list, i.e. an item which does not have any child items. To enable this option:
- In Configure of a user prompt of type MP Enumeration List, under Selection Mode, choose Only elements without children

You can also bind a user prompt to a child item in a MP Enumeration List. When doing this, only child items of the selected item will be available for selection. To enable this option:
- In Configure of a user prompt of type MP Enumeration List, enable Bind to child item and choose a child item

Default number of questions per page
To set the default number of questions per page for request offerings:
- Navigate to the ITSM Portal folder, by default
%SYSTEMDRIVE%\inetpub\SylianceITSMPortal\ - Open web.config for editing
Note: by default, this folder is protected by UAC. You must run your text editor with elevated permission (“Run as Administrator”) to edit this file. - Locate the following line:
<add key="defaultROPageSize" value="2" /> - Uncomment the line (remove
<!--and-->) - Set the value attribute
- Save changes in web.config
Display questions in Repeating Tables
Within a Request Offering you can include Repeating Tables. These Repeating Tables can display a set number of questions for a set or infinite number of iterations.
To insert a Repeating Table:
- Create a new Request Offering or edit an existing Request Offering for ITSM Portal.
- Configure the user prompts then in the Layout section click the green Plus sign to add a Repeating Table.
- Give the Repeating Table a name then choose the iterations:
- Min Appearance (minimum 1)
- Max Appearance (0 = infinite)
- If you choose 0 in Max Appearance then the user filling the form can decide when the form is finished by clicking on Done, they can also choose to add new rows by selecting the “Add new row when Done pressed” checkbox or clicking on the Plus sign at any time.
- A new Repeating Table can be added at any time by clicking on the green Plus sign.
- The Repeating Table can only contain prompts defined in the User Prompts section of the offering.
- The “Use in summary” option adds the entered data to the summary field of each repeated instance of the table when “Done” is clicked, so that the data can be easily seen when the instance is in a collapsed state.
Show/Hide conditions for Prompts
Except for the first question in an offering, any subsequent question can be configured with a show/hide condition, these apply to questions in Repeating Tables also. The conditions are formed from a Boolean expression and a conditional expression and relate to one of the preceding questions.
The Boolean part evaluates the conditional expression and returns true or false. Then the question is shown or hidden.
The conditional expression can be one of:
- Equals (Must be exact match. No wildcards allowed)
- Not equals (Must be exact match. No wildcards allowed)
- Contains (Compares Strings and Simple Lists. Wildcards are implied and no wildcard characters are required)
- Not contains (Compares Strings and Simple Lists. Wildcards are implied and no wildcard characters are required)
- RegExMatch (Must be a properly formed regular expression)
For example, to show question 2 only when question 1 equals a text string which exactly matches “This is a text string” the condition on question 2 would look like this:

The conditions are configured in the Layout section of the RO Editor, to the right of each question. By default each question will have a condition of ”Show always”.
When you configure a condition on a question which is the first question in a new page, you have the option to use the condition for the entire page by checking “use for entire page”:

When prompts are not displayed in the ITSM Portal due to the resultant conditional evaluation then the Response Type (Required, Optional or Display Only) configured in the User Prompts section is suppressed. Only when the prompts are shown do these conditions play a part.
Do not add hidden questions to User Input
By default, all questions are added to the User Input, even hidden ones. You can change this behavior by setting the property
addHiddenQuestionToUserInputin web.config tofalse.
Map object properties to prompts
Responses and answers to prompts and questions can be mapped to writeable properties of SCSM objects. For instance, map one or more prompts to the description field of a Service Request.
All prompt types, other than File Attachment, can be mapped to object properties. Individual prompts can be mapped to individual properties, in addition you can map multiple prompts to single properties, called Multimapping. Within Multimapping you can add additional text strings, for example a Simple List prompt called HWType in a RO to order hardware could prompt for selection of hardware type (Desktop, Laptop, Monitor) and be mapped to the Title property of a Service Request with an additional string of “Hardware Order:”. This would look like “Hardware Order: [1.HWType]” and is configured as follows:
- Edit or Create RO for ITSM Portal
- In the Map Prompts section scroll to find the property you want to map to a prompt or prompts
- In the Prompt Output column choose the desired prompt from the dropdown list
- Or - - Click on the ellipsis to the right of the Multiple Mapping column: here you can type text and select prompts from the dropdown list; click on Add to insert the prompt to the mapping.
- When finished, multiple mappings will show in the editor window like arrays “{1}{2}{3}…” and any additional strings will also be displayed, e.g.: “Hardware Order:{1}”
Time Zone for string values
All dates in SCSM are stored in the UTC format. This is an excellent way when you use Service Manager in different time zones: when Service Manager shows a datetime value, the current time zone is used to convert the value.
Unfortunately, when you use multimapping, all datetime values are converted to strings. In version prior to 2.0.3.5, all datetime values were saved in UTC (you may have noticed the postfix after the datetime value). This becomes an issue when you want to display the date-only value. In this case you may have situation when the date selected by the user does not match to the value in the multimapping. Imagine that your user is located in UK. They have UTC+01:00 summer time. The user picks 20.06.2016 in the date picker. In fact, the real datetime value is “20.06.2016 00:00:00.0000”. And this value will be written to the SCSM database, but in UTC format. 20.06.2016 00:00 UTC+1 will be converted to 19.06.2016 23:00:00.0000 UTC. And this value will be written to the multimapping field. This is confusing.
To avoid this, we introduced two new options in web.config: timeZoneForStringValues and useClientTimeForStringValues.
With timeZoneForStringValues you can specify the time zone that will be used to convert datetime values to string. Please use Time Zone Id as value:
<add key="timeZoneForStringValues" value=" W. Europe Standard Time" />
You can get all time zone IDs by PowerShell:
[System.TimeZoneInfo]::GetSystemTimeZones() | select Id, DisplayName
The useClientTimeForStringValues option allows you to use the client’s time zone. If set to true then the value in the multimapping will be written using the client time zone, not UTC. That could be useful if you have several time zones for your clients.
<add key="useClientTimeForStringValues" value="true" />
Linking Activities
In System Center Service Manager it is possible to link Activities to Work Items to expedite incident resolution, or automate fulfilment of service requests. You can allow analysts, operators, or delegated users to fulfill Form Filling or Checklist Activities directly in the ITSM Portal.
These special activities are provided by the ITSM Portal. They can be assigned to work item templates similarly to Review Activities which are provided by SCSM.
Form Filling Activities
A Form Filling Activity can be used in an activity workflow to provide additional information to a Request Offering where this information should be inputted by a designated person or group. For example, a New Employee request submitted through the ITSM Portal contains a Form Filling Activity to be completed by HR before the request can proceed to either the next Activity or request completion.
Creating a Form Filling Activity
- Create a template for the Request Offering associated with the appropriate SCSM Class i.e. Service Request but choose not to configure the template object yet.
- Create a RO for ITSM Portal
- Choose the newly created Template
- Configure the Prompts, Layout and Mappings for the information which needs to be added
- Publish the RO but do not add to a Service Offering. This is the Form Filling RO.
- Create another RO using Create RO for ITSM Portal
- Choose the newly created Template
- Configure the Prompts, Layout and Mappings for the information which needs to be added
- Publish the RO and add to a Service Offering. This is the Parent RO.
- Return to the Template and open the Template Form
- Under the Activities Tab add a Default Form Filling Activity workflow
- Assign this Activity to the Form Filling RO and save the Template
When an instance of the Parent RO is submitted in the ITSM Portal the Activity workflow is triggered. Once the Activity is assigned an Activity Implementer, either manually in the SCSM console or by an automation workflow, the Activity is available in the ITSM Portal for the Implementer. They can then complete the form fields and submit the change back to the request.
The assignment of the request offering, and the subsequent assignment of activity implementer, is visible in the ITSM Portal to the affected user, as is the status of the request and associated activities.
Note: The Form Filling Activity can ONLY be completed in the ITSM Portal.
Setting custom permissions for Form Filling Activities
By default, users in any User Roles based on the End User profile have no permissions to create custom objects like Tasks for Checklist Activities. To set these permissions:
- Run PowerShell on any computer where the SCSM management server or a console is installed
- Change directory to the ITSM Portal folder, by default %SYSTEMDRIVE%\inetpub\SylianceITSMPortal\
- Change directory to Docs\
- Run
Set-FormFillingActivityPermissions.ps1with parameters:
-profilename: Name of the User Role Profile (this is not the same as User Role)
-scsmServerName: optionally, the name of the management server to connect to. The default value is localhost
To check which profile name to use:
- Open the SCSM Console
- Navigate to Administration 🡢 Security 🡢 User Roles
- Open the user role that requires permissions to create Form Filling Activities
- The display name of the User Role Profile will be displayed in first text box;
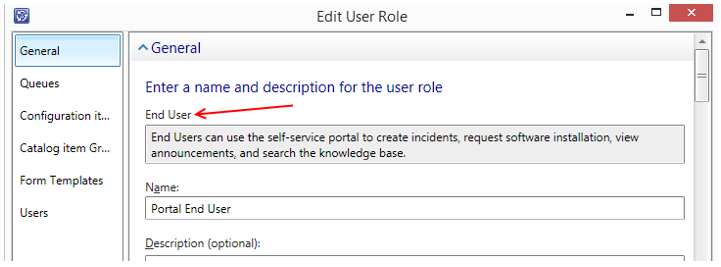
- Select the proper User Profile Name from the table below
| Display Name | Name |
|---|---|
| End User | EndUser |
| Activity Implementer | ActivityImplementer |
| Advanced Operator | AdvancedOperator |
| Author | Author |
| Change Initiator | ChangeInitiator |
| Change Manager | ChangeManager |
| Incident Resolver | IncidentResolver |
| Operator | Operator |
| Problem Analyst | ProblemAnalyst |
| Read Only Operator | ReadOnlyOperator |
| Release Manager | ReleaseManager |
| Service Request Analyst | ServiceRequestAnalyst |
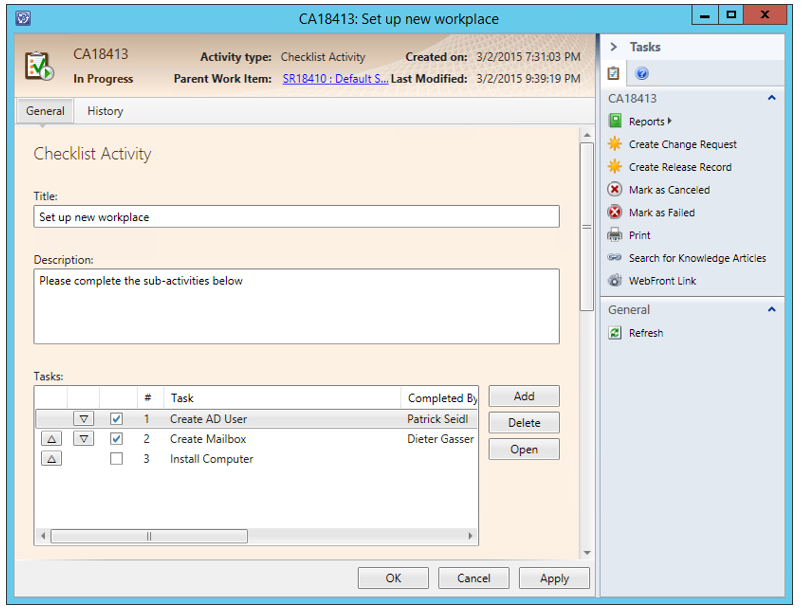
Checklist Activities
A Checklist Activity can be used similarly to a Manual Activity whereby an operator or delegated user is required to confirm that certain actions have been completed by checking the items in the checklist.
Unlike a Form Filling Activity, a Checklist Activity does not require a supplemental RO. And unlike a Form Filling Activity, the Checklist Activity can be completed either in the ITSM Portal or the SCSM Console.
Creating a Checklist Activity
- Create a template for the Request Offering associated with the appropriate SCSM Class i.e. Service Request.
- Return to the Template and open the Template Form
- Under the Activities Tab add a Default Checklist Activity workflow
- Save the Template
- Create a RO for ITSM Portal
- Choose the newly created Template
- Configure the Prompts, Layout and Mappings for the information which needs to be added
- Publish the RO and add to a Service Offering.
When an instance of the RO is submitted in the ITSM Portal the Activity workflow is triggered. Once the Activity is assigned an Activity Implementer, either manually in the SCSM console or by an automation workflow, the Activity is available in the ITSM Portal or the SCSM console for the Implementer. They can then check the items in the Checklist and complete the Activity in the request.
The assignment of the request offering, and the subsequent assignment of activity implementer, is visible in the ITSM Portal to the affected user, as is the status of the request and associated activities.
Note: If actioned in the SCSM console the implementer is prompted to complete the Activity once all checkboxes are checked. In the ITSM Portal, there is no prompt and the implementer must click on Complete to complete the Activity.
Setting custom permissions for Checklist Activities
By default, users in any User Roles based onthe End User profile have no permissions to create custom objects like Tasks for Checklist Activities. To set these permissions:
- Run PowerShell on any computer where the SCSM management server or a console is installed
- Change directory to the ITSM Portal folder, by default %SYSTEMDRIVE%\inetpub\SylianceITSMPortal\
- Change directory to Docs\
- Run
Set-SylianceCheckListActivityPermissions.ps1with parameters:
-profilename: Name of the User Role Profile (this is not the same as User Role)
-scsmServerName: optionally, the name of management server to connect to. The default value is localhost
To check which profile name to use:
- Open the SCSM Console
- Navigate to Administration 🡢 Security 🡢 User Roles
- Open the user role that requires permissions to create Form Filling Activities
- The display name of the User Role Profile will be displayed in first text box;
- Select the proper User Profile Name from table below
| Display Name | Name |
|---|---|
| End User | EndUser |
| Activity Implementer | ActivityImplementer |
| Advanced Operator | AdvancedOperator |
| Author | Author |
| Change Initiator | ChangeInitiator |
| Change Manager | ChangeManager |
| Incident Resolver | IncidentResolver |
| Operator | Operator |
| Problem Analyst | ProblemAnalyst |
| Read Only Operator | ReadOnlyOperator |
| Release Manager | ReleaseManager |
| Service Request Analyst | ServiceRequestAnalyst |
Display icons for Configuration Items
The ITSM Portal allows you to show icons (images) for any configuration items inside the Query Result.
To enable this feature you must:
- Set the icon using the SCSM Console or SDK.
- Create an additional type projection.
- Configure a Query Result
Set the icon using SCSM console or SDK
To set the icon using the SCSM Console:
- Open the SCSM Console
- Locate the desired configuration item
- Click the Assign Icon console task
- Click the Browse… button and select the required image
- Click OK to save changes
Note: recommended size of images is 16x16 or 32x32 pixels
To set the icon using the SDK please create a new object of System.FileAttachment class and set the relationship between the created attachment and the desired configuration item using a Syliance.ConfigItemHasIcon relationship class. Please refer to the SDK documentation for more details.
Create an additional Type Projection
To be able to use icons inside the Query Result you must first create an additional Type Projection (or combination class in terms of the SCSM Console). This Type Projection must contain a component with the Path attribute set to a Syliance.ConfigItemHasIcon relationship class and the Alias attribute set to Icon.
Out-of-box, the Type Projection for the Business Service class exists in the Syliance.ITSMPortalSupporting.Objects Management Pack.
<TypeProjection ID="Syliance.ITSMPortalSupporting.Objects.BusinessService.ProjectionType" Accessibility="Public" Type="ServiceDesigner!Microsoft.SystemCenter.BusinessService">
    <Component Path="$Context/Path[Relationship='ITSMPortalSupporting!Syliance.ConfigItemHasIcon']$" Alias="Icon" />
</TypeProjection>
You can use this Type Projection as an example to create your own Type Projections.
Configure the Query Result
To display an icon at the Query Result:
- Open the SCSM Console
- Open the desired Request Offering for editing
- Add a question and set the type to Query Result
- Scroll down to Configure Prompts, select the created question and click the Configure button
- On the Select Class tab change the filter to Combination Classes and find the combination class created at the prevision step.
- Optionally, configure the criteria
- On the Display Columns tab, click on Has Icon and click on the Content column
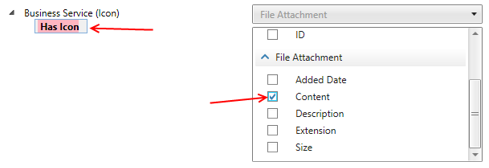
- Optionally, add other columns
- Save Query Result and Request Offering
Include information about the client computer in the request
With the itnetX ITSM Portal you can include information about the client’s computer in a created request. You can include the client’s computer object as a related object and/or the client’s IP address to any text field.
Computer detection is enabled in the ITSM Portal by default. The itnetX ITSM Portal tries to detect the client’s computer and then find it in the CMDB in the following order:
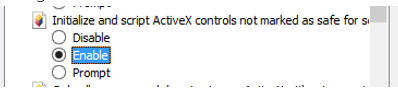
- If the client is using Internet Explorer and the detectComputerWithActiveX property in web.config is set to true, the ITSM Portal tries to get the value of the HostName property from the WScript.Network ActiveX component. This ActiveX component is installed on all Windows computers, but you must enable the “Initialize and script ActiveX controls not marked as safe for scripting” option in IE’s Security settings (see below). If the HostName property is present, the value is used to search the NetbiosComputerName property of the Windows Computer class. If an object is found, it will be added to the request with the given relationship (please see the settings below).
- If the HostName property value is empty, the IP address of the client is used.
- The IP address is used to get the computer object using the relationship Windows Computer -> Network Interface. If an object is found, it will be added to the request with the given relationship (please see the settings below).
- If no object is found in the CMDB by IP, a DNS query will used to try and detect the FQDN of the client’s computer by IP address. If a DNS record is found, the FQDN is used to search by the DNSName property of Windows Computer class. If an object is found, it will be added to the request with the given relationship (please see the settings below).
The computer object will be added to the request using the relationship with the ID defined in web.config in the relationshipsForComputer property. By default, System.WorkItemAboutConfigItem is used.
To disable computer detection please change the value of the addUsersComputerToAffectedCIs property in web.config to false.
To save the client’s IP address you can set the classPropertyForIP property in web.config. If this property is defined, the client’s IP address will be written to the property of the request with the given name. If the request already has a value in this property, then two line breaks and the IP address will be appended after the existing value.
How to change the ActiveX settings to enable computer detection
The ActiveX settings in Internet Explorer can change the behavior of computer detection, the options are:
- Disable: prevents use of the ActiveX component and computer detection will not work.
- Enable: allows the ActiveX without any prompts. Computer detection will work.
- Prompt: displays a confirmation to the user to allow the ActiveX component, computer detection will only work if the user presses the Allow button when prompted.
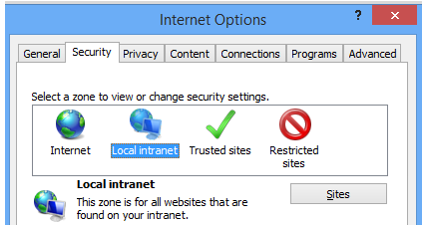
To enable running ActiveX components in Internet Explorer, the URL of the ITSM Portal must be in the Local Intranet or Trusted Sites zone. To allow the WScript.Network ActiveX to run without prompting, set the option “Initialize and script ActiveX controls not marked as safe for scripting” to “Enable”. To do this:
- Open Tools 🡢 Internet Options in Internet Explorer
- Navigate to the Security tab
- Select Local Intranet zone or Trusted Sites zone, depending on which zone the URL of the ITSM Portal is in.
- Press Custom Level…
- Scroll down to the “ActiveX controls and plug-ins” section
- Find the “Initialize and script ActiveX controls not marked as safe for scripting” setting and set it to Enabled:
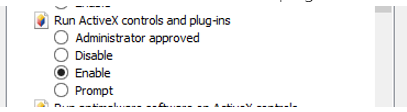
- Find the “Run ActiveX controls and plug-ins” and set it to Enabled:
- Press OK to save your settings
You can use an Active Directory GPO (Group Policy Object) to propagate these settings to all users in your environment.
Plain Service Catalog
The default behavior of ITSM Portal when users browse the Service Catalog is a 3-click experience:
- 1st click: Choose Service Offering 🡢 Service Offering Details are displayed
- 2nd click: Choose Request Offering 🡢 Request Offering Details are displayed
- 3rd click: Click “Create New Request” 🡢 Request Offering Form is loaded
You can skip the 3rd click by enabling the Open Request Offering directly option in a Request Offering. This is explained here.
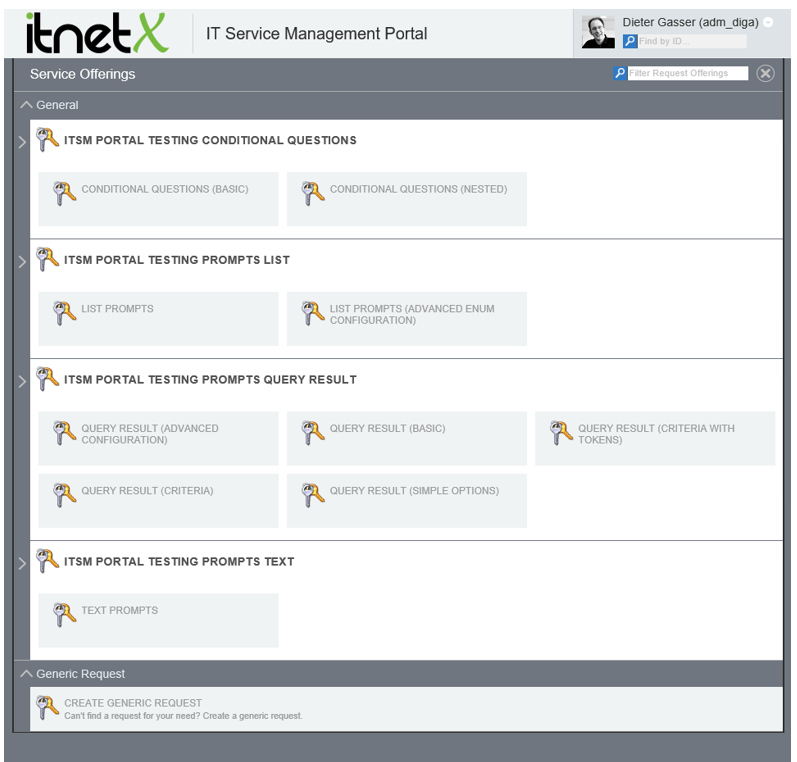
You can also skip the 1st click by enabling the Plain Service Catalog View. This view will display all Service Offerings and Request Offerings on one page, and also allow the users to filter Request Offerings by using search in the header of the Service Catalog. The Details page of the Service Offerings is never displayed.
To enable the Plain Service Catalog View, change the value of useServiceCatalogPlainView in web.config to true.
Performance
When all service offerings and request offerings are loaded at the same time, the time for loading a large service catalog can be long for your end users. We recommend to use Plain Service Catalog only for service catalogs with less than 50 request offerings.
The Plain Service Catalog is cached on the server for each user. This means that the time needed to load the page for the first time will be much longer than for any subsequent requests. To refresh the cache please use reload without cache (Ctrl-F5 in any desktop browser).
Please note that the Details of the Request Offerings (2nd click) will still be displayed when the user clicks a Request Offering. However, by enabling both the Open Request Offering directly option and the Plain Service Catalog View, you can achieve a one-click user experience when browsing the Service Catalog.
Query customization
One of the main features of itnetX ITSM Portal is to display requests and activities for end users. By default, there are six different pages with lists of requests and/or activities:
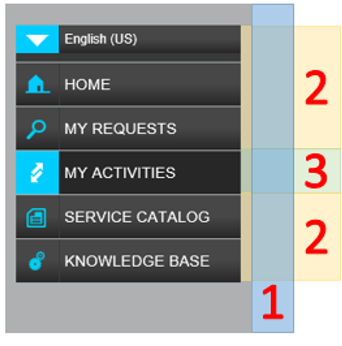
- Home: active Incidents, Service Requests and Change Requests where the current user is affected or created by; running Manual Activities and Fill Form Activities assigned to the current user; Review Activities where the current user is a reviewer.
- My Requests: Incidents, Service Requests and Change Requests where the current user is affected or created by, with the ability to filter by status and/or type of request
- My Activities: Manual Activities and Fill Form Activities assigned to the current user; Review Activities where the current user is a reviewer, with the ability to filter by status and/or type of activity
- My Team Requests: Incidents, Service Requests and Change Requests where the current user is manager of affected user or manager of created by, with the ability to filter by status and/or type of request.
- My Team Activities: Manual Activities and Fill Form Activities where the current user is manager of assigned to user; Review Activities where the current user is manager of reviewer, with the ability to filter by status and/or type of activity
- Search Result: Incidents, Service Requests, Change Requests, Manual Activities and Fill Form Activities returned after search
Basic query customization
Please make a backup of the Queries.xml file before making any changes.
How to change queries for Home page
By default, work items defined in the table below will be displayed in the Home page:
| Section | Work Item type | Filter |
|---|---|---|
| Requests | Incident | Status != “Closed” AND Status != “Resolved” AND (AffectedUser = [me] OR Createdby = [me]) |
| Requests | Service Request | Status != “Closed” AND Status != “Canceled” AND Status != “Completed” AND Status != “Failed” AND (AffectedUser = [me] OR Createdby = [me]) |
| Requests | Change Request | Status != “Closed” AND Status != “Canceled” AND Status != “Completed” AND Status != “Failed” AND (AffectedUser = [me] OR Createdby = [me]) |
| Activities | Review Activity | Status = “Running” AND Reviewer\ReviewerIsUser = [me] |
| Activities | Manual Activity | Status = “Running” AND AssignedTo = [me] |
| Activities | Fill Form Activity | Status = “Running” AND AssignedTo = [me] |
How to change status filters for Home page
To change status filters for the incident query:
- Navigate to the ITSM Portal folder, by default
%SYSTEMDRIVE%\inetpub\SylianceITSMPortal\ - Open
\Settings\Queries.xmlfor editing - Locate the element
<SelectActiveOnlyRequests>and sub element<SelectIncidentType> - Inside
<SelectIncidentType>locate the<Query>\<Status>elements and add or remove the appropriate status IDs. For instance, to include “Pending” in a query you must add<Status> b6679968-e84e-96fa-1fec-8cd4ab39c3de</Status>to the<Query>element:
<SelectIncidentType>
    <TypeProjection>22f5f549-f92d-6739-74cc-b5b3289e392e</TypeProjection>
    <Query Shared="GetWIByAffectedUserOrCreatedByWithStatusNotInFilter">
        <ClassId>a604b942-4c7b-2fb2-28dc-61dc6f465c68</ClassId>
        <StatusPropertyId>b528d69d-987b-1f9d-6eed-4cced7f53b3c</StatusPropertyId>
        <!-- Closed -->
        <Status>bd0ae7c4-3315-2eb3-7933-82dfc482dbaf</Status>
        <!-- Resolved -->
        <Status>2b8830b6-59f0-f574-9c2a-f4b4682f1681</Status>
        <Status>b6679968-e84e-96fa-1fec-8cd4ab39c3de</Status>
    </Query>
</SelectIncidentType>
To change the status for service requests and change requests please repeat the above steps, but use <SelectServiceRequestType> for SR and <SelectChangeRequestType> for CR respectively.
To change the status filter for Manual Activity and Fill Form Activity:
- Navigate to the ITSM Portal folder, by default
%SYSTEMDRIVE%\inetpub\SylianceITSMPortal\ - Open
\Settings\Queries.xmlfor editing - Locate element
<GetMyRunningActivityByAssignedUser>with child<Criteria> - Change Criteria element to any valid SDK XML-like criteria
Note: GetMyRunningActivityByAssignedUser criterion is shared between many queries. Changes made to this criterion will impact all affected queries. Please refer to How to change queries for Search
By default, the “search by ID” feature is limited to search by: * work items that are * assigned to user * created by user * affected user * user is manager of user (non-recursive) * user is reviewer.
If you want to change these definitions, edit the GetSearchResultForRequests, GetSearchResultForActivity and GetSearchResultForRA elements in the SharedQueries section of Queries.xml.
Note: by default, the first two characters can be any when a search by ID is performed. This is defined in the query definition. You can use only T-SQL wildcard characters in your query definition.
Queries.xml file definition
How to change the relationship criteria for the Home page
To change the relationships and criteria used for the requests list on the Home page for incidents, service requests and change requests:
- Navigate to the ITSM Portal folder, by default
%SYSTEMDRIVE%\inetpub\SylianceITSMPortal\ - Open
\Settings\Queries.xmlfor editing - Locate element
<GetWIByAffectedUserOrCreatedByWithStatusNotInFilter>with child<Criteria> - Change Criteria element to any valid SDK XML-like criteria
Note:
GetWIByAffectedUserOrCreatedByWithStatusNotInFilterandGetWIByAffectedUserOrCreatedByWithStatusInFiltercriteria are shared between many queries. Changes made to these criteria will impact all affected queries. Please refer to How to change queries for Search
By default, the “search by ID” feature is limited to search by:
- work items that are
- assigned to user
- created by user
- affected user
- user is manager of user (non-recursive)
- user is reviewer.
If you want to change these definitions, edit the GetSearchResultForRequests, GetSearchResultForActivity and GetSearchResultForRA elements in the SharedQueries section of Queries.xml.
Note: by default, the first two characters can be any when a search by ID is performed. This is defined in the query definition. You can use only T-SQL wildcard characters in your query definition.
Queries.xml file definition
How to change queries for Search
By default, the “search by ID” feature is limited to search by:
- work items that are
- assigned to user
- created by user
- affected user
- user is manager of user (non-recursive)
- user is reviewer.
If you want to change these definitions, edit the GetSearchResultForRequests, GetSearchResultForActivity and GetSearchResultForRA elements in the SharedQueries section of Queries.xml.
Note: by default, the first two characters can be any when a search by ID is performed. This is defined in the query definition. You can use only T-SQL wildcard characters in your query definition.
Queries.xml file definition
The itnetX ITSM Portal allows you to change the query definitions. The configuration of all pages and their respective queries, is stored in the \Settings\Queries.xml file. This is a simple XML file with three sections:
- Pages
- Filters for each page (optional)
- Queries for each page and/or filter
QueriesData element
The root element is QueriesData. This is a mandatory element and it cannot be changed.
QueriesSettings element
The first sub-element is QueriesSettings. This element contains definition for each page, where the name of the element is the name of page URL after the Home button (empty string after Home equal to “Index”).
Pages sub elements
Possible sub elements of page elements are listed in the table below.
| Element | Required | Possible value | Description |
|---|---|---|---|
| LoadRequests | Yes | true/false | Show (true) or hide (false) requests section of the page |
| LoadActivities | Yes | true/false | Show (true) or hide (false) activities section of the page |
| ShowFilter | Yes | true/false | Show (true) or hide (false) filter section. |
| RequestsSubTitleResource | Yes | text | Title of requests section. Must be the name of the string resources defined in Resource.resx file |
| ActivitiesSubTitleResource | Yes | text | Title for activities section. Must be the name of the string resources defined in Resource.resx file |
| StatusFilter | Yes, if ShowFilter set to true | Sub-elements | List of possible filters for Status filter. See StatusFilter element below for more information. |
| TypeFilter | Yes, if ShowFilter set to true | Sub-elements | List of possible filters for Type filter. See TypeFilter element below for more information. |
StatusFilter, RequestStatusFilter or ActivityStatusFilter element
This element must contain a list of sub elements for each possible filter by status value. The name of the element must match an element defined in QueryFilters (see below).
You can use RequestStatusFilter and ActivityStatusFilter elements to define filters for requests and activities respectable.
If the StatusFilter element is not defined, the values defined in loadWIs.js for variables filterOption and activityFilterOption are used. Please search for “filterOption: ko.observable(” and “activityFilterOption: ko.observable(” (without quotes)
TypeFilter element
This element must contain a list of sub elements for each possible filter by type value. The name of the element must match an element defined in QueryFilters (see below).
If the TypeFilter element is not defined, the values defined in loadWIs.js for variables filterTypeOptions and activityTypeFilterOption iare used. Please search for “filterTypeOption: ko.observable(” and “activityTypeFilterOption: ko.observable(” (without quotes)
Note: There is one predefined type filter – SelectAllTypes. If this filter is selected, then all child type queries will execute.
QueryFilters element
This element contains information about each possible status filter and the reference to the query definition for each work item type (class).
Status Filter element
The name of the element must match the name of the status filter defined in section StatusFilter, RequestStatusFilter or ActivityStatusFilter element above. Each element contains a TypeProjection and a Query element.
Type Filter element
The name of the element must match the name of the type filter defined in section TypeFilter element above. Each element contains a TypeProjection and a Query element.
TypeProjection element
Type projection (combination class) ID (Guid) that will be used to query for the current type of work item.
Query element
References the query definition that will be used to query the status against the current type of work item. The Shared attribute must match the element name in the SharedQueries section.
Optionally, this element can have the following sub elements:
| Element | Possible value | Description |
|---|---|---|
| ClassId | Guid | Class id that will be used in the query |
| StatusPropertyId | Guid | Property ID that will be used in the query |
| Status | Guid | Can be one or more elements that include the ID(s) of the enumeration value(s) available for Status(es) |
PropertiesToLoad element
Optional element. Allows to define a list of properties to be loaded. Must contain <Property> elements with value set to the internal name of the property.
Note: Id, Title, Status and CreatedDate will always be loaded regardless of the PropertiesToLoad element
SharedQueries element
This section contains query definitions used in the Query element in the QueryFilters section. Each sub element must match the value of the Shared attribute in the Query element (see section Query element).
“Query definition” element
Contains a query definition in valid SCSM SDK XML, starting with <Criteria xmlns='http://Microsoft.EnterpriseManagement.Core.Criteria/'>.
Possible tokens that can be used are:
| Token | Description |
|---|---|
| {0} | Domain name (NetBIOS) of current user |
| {1} | User name of current user |
| {2} | Class id, defined for this query in Query element |
| {3} | Property ID, defined for this query in Query element |
| {4} | Status ID(s), wrapped within a <Values></Values> element, defined for this query in Query element |
Inside the Query definition you can use any valid SDK query elements and an additional custom element <CurrentUser>. This element can be used only as replacement of <Value> or <Token>. The text in the CurrentUser element must be a valid and existing property of the User object in your CMDB, for instance:
<CurrentUser>Country</CurrentUser>
When executed, ITSMPortal will replace the CurrentUser element with the actual property-value belonging to the currently logged on user. This can be used to filter objects by user property, for instance to show requests where affected users are in the same department or country as the current user. You can find examples in the GetWIByAffectedUserCountry query definition.
Work Items Settings
With the itnetX ITSM Portal you can control the behavior of additional features related to work items. This section describes the settings and parameters that you can change.
Customer Satisfaction
Incidents in status resolved and Service Requests in status Failed, Completed or Canceled can be rated by your end users using star-rating. Also, you end users can submit a comment on their satisfaction with the resolution of their request.
Set predefined rating
By default, to rate the request the user must click the rating stars (please refer to Usage Guide for more info). You create a direct link to the rating comment dialog window of a request by providing the “rating” parameter in the URL:
server/Request/Index/fe630675-6f37-5be6-d3b6-08a0e72d33c0?rating=1
The value for the “rating” parameter must be between 1 and the maximum available rating value (5 by default). If the parameter is not provided or the value is not within the valid range then nothing will happen.
If the value is a valid rating value then the “Rate this request” dialog box will be displayed when the page is loaded.
Close request on rating
You can close requests automatically (set status to Closed) once rated. This setting is disabled by default. To enable it:
- Navigate to the ITSM Portal folder, by default
%SYSTEMDRIVE%\inetpub\SylianceITSMPortal\ - Open
web.configfor editing
Note: by default, this folder is protected by UAC. You must run your text editor with elevated permissions (“Run as Administrator”) to edit this file. - Find the following line:
<add key="closeOnRate" value="false" /> - Change value attribute to true
- Save changes in
web.config
Show the ratings box for custom classes
By default, Customer Satisfaction is enabled for Incidents and Service Requests. You can extend this behavior to other Work Items by adding a Class Extension to any Class based on the Work Item class (How to Extend a Class in the Authoring Tool). This class extension must contain definitions of two fields:
<Property ID="CustomerSatisfaction" Type="int" AutoIncrement="false" Key="false" CaseSensitive="false" MaxLength="256" MinLength="0" Required="false" />
<Property ID="CustomerSatisfactionComment" Type="string" AutoIncrement="false" Key="false" CaseSensitive="false" MaxLength="4000" MinLength="0" Required="false" />
Also, in the work item’s type view, you must insert the following HTML markup:
@Html.Partial("TemplateWIRating", new string[] { "c7b65747-f99e-c108-1e17-3c1062138fc4", "b026fdfd-89bd-490b-e1fd-a599c78d440f" })
where new string[] {} is an array of ID statuses, when the ratings box must appear on the page.
Please refer to /View/Request/IncidentView.cshtml file in the ITSM Portal folder for an example.
Work Item Forms
Disable Preview Pane
By default, when you click on any element in the list the preview form appears. You can disable this and open the full form directly. To do this:
- Navigate to the ITSM Portal folder, by default
%SYSTEMDRIVE%\inetpub\SylianceITSMPortal\ - Open
web.configfor editing
Note: by default, this folder is protected by UAC. You must run your text editor with elevated permission (“Run as Administrator”) to edit this file. - Find the following line:
<add key="disablePreviewForm" value="false" /> - Change value attribute to true
- Save changes in
web.config
Language customization
Overview
The itnetX ITSM Portal uses English (United States) as it’s default language. The actual language presented to users is determined using the following set of rules in the following order:
- Cookies. The cookies contain information about the previously selected or auto-detected language.
- Language from user’s browser settings
- ITSM Portal default language
The language will be selected only if it is available and loaded in the itnetX ITSM Portal, otherwise it will default to the ITSM Portal default language.
Localization vs. Globalization
There are two language-specific scopes in the itnetX ITSM Portal: Localization and Globalization. Localization is the process of displaying text in the user’s language. Globalization is the format-specific display of information (date/time format, number format, etc.).
Although you can select the localization language in the portal, the globalization settings are always detected by the user’s bowser settings. For instance, if Deutsch (Deutschland) is the first language in your browser but you select English (United States) in ITSM Portal, all strings will be displayed in English, but date\time formats (and other culture-related formats) will be in the German format.
How to change default language
The default language can be set using standard four-letter (en-US) or two-letter (en) language codes.
To change the default language:
- The required language must be one of English (US), German or Russian. If a different language is required then a custom language pack must first be created (See How to add your custom language)
- Navigate to the ITSM Portal folder, by default
%SYSTEMDRIVE%\inetpub\SylianceITSMPortal\ - Open
\Scripts\languages\languages.jsfile for editing - Navigate to line with this code (around line 17):
Languages.defaultLanguage = "en-US"; - Change en-US to any valid language code, using the four- or two-letter code. For instance, to change default language to German, set the value to:
Languages.defaultLanguage = "de";
How to override language for all users and disable language selection
To override the default language for all users and disable language selection:
- Set language that you want to set for all users (please refer to How to change default language).
- Navigate to the ITSM Portal folder, by default
%SYSTEMDRIVE%\inetpub\SylianceITSMPortal\ - Remove all language files from
\Scripts\languages\folder expect your default language.
How to hide the language selector
To hide the language selector:
- Navigate to the ITSM Portal folder, by default
%SYSTEMDRIVE%\inetpub\SylianceITSMPortal\ - Open
\Content\themes\[YourTheme]\main.css(where base is you current theme name) file for edit - Find these lines:
.languageselector{ margin-top: 20px; } - Change to:
.languageselector{
    margin-top: 20px;
    display: none;
}
How to change strings in existing languages
To change specific strings in an existing language:
- Navigate to the ITSM Portal folder, by default
%SYSTEMDRIVE%\inetpub\SylianceITSMPortal\ - Create a copy of the
\App_GlobalResources\Resource.%code%.resxfile for edit, where%code%is the language code (it’s empty for English (United States) language) and change its name toResource_custom.%code%.resx(orResource_custom.resxfor English (United States) language) - Located the required string
- Change the string inside of the
<value>element - Save the file
Common string IDs in Resource file:
| String description | String ID |
|---|---|
| Portal header | PortalName |
How to add your custom language
To add your custom language:
- Navigate to the ITSM Portal folder, by default
%SYSTEMDRIVE%\inetpub\SylianceITSMPortal\ - Change directory to
Docs\LP\ - Run
prepareLP.ps1, and enter the language code when requested
Note: You can use the four- or two-letter language code - Open the %code% folder, where %code% is language code you entered in the prevision step
- Translate all strings in the
language.%code%.jsfile. Please translate only the right part of each line, for example:
strings: {
            "Name": "Name",
            "Value": "Value",
Note: In validation strings section, the {0} sequence is a replacement token. Make sure to leave it as is. - Copy
language.%code%.jsto the\Scripts\languagesfolder - Translate the
Resource.%code%.resxfile. Please translate only the strings inside the<value>elements that are child elements of<data>elements (starting at line 120). For example:
<data name="AndTypeOfText" xml:space="preserve"> <value>and type of</value> </data> - Copy
Resource.%code%.resxto the\App_GlobalResources\folder - Optionally, you can translate Display Strings in
Syliance.ITSMPortalSupporting.LP.%code%.xmlmanagement pack if you want to use the SCSM Console with the specified language. Please import theSyliance.ITSMPortalSupporting.LP.%code%.xmlmanagement pack after translation.
Please share your custom language files with us to allow us to include them in future releases.
You can send the files to customer@operaio.ch
Thank you!
How to add a specific culture
To add a new culture that is not present in ITSMPortal:
- Run Command Prompt (cmd) with evaluated permissions (“As Administrator”)
- Navigate to the ITSM Portal folder, by default
%SYSTEMDRIVE%\inetpub\SylianceITSMPortal\ - Change directory to
Docs\LP\ - Run the following command
jquery.globalize.generator.exe /c:%code%
where %code% is any valid four- or two-letter language code. For instance, to generate an English (United Kingdom) culture run the following command:
jquery.globalize.generator.exe /c:en-gb - As a result of this provisioning command, a file called globalize.culture.%code%.js will be generated. Copy this file to \Scripts\culture folder.
- Refresh the portal with the no-cache command (Ctrl-F5) or restart the browser.
Basic UI Customization
Changes to .css and UISettings.xml
Note: all modifications made to CSS files under the base directory (except customization.css) will be lost during the upgrade. Also, any other modifications to files other than themes and web.config will be lost.
How to change the company logo
Follow these steps to change the company logo:
- Navigate to the ITSM Portal folder, by default
%SYSTEMDRIVE%\inetpub\SylianceITSMPortal\ - Change the directory to
\Content\base\images - Replace the file
companyLogo.pngwith a custom PNG image of 230x60 pixels.
How to change the title of the ITSM portal
To change the title of the ITSM Portal, please refer to the “How to change strings in existing languages” section and find the line
<data name="PortalName" xml:space="preserve">
How to hide My Team Requests navigation link
To hide My Team Requests navigation link:
- Navigate to the ITSM Portal folder, by default
%SYSTEMDRIVE%\inetpub\SylianceITSMPortal\ - Change directory to
\Settings\ - Open
UISettings.xmlfor editing - Remove or comment the NavLink element where Id equals
myteamrequestsnav - Save the file
- Refresh the page using the Ctrl-F5 key combination
How to add navigation links for specified language
You can add navigation links to main navigation menu that can be visible only for specified language. This can be helpful if you want to create direct links to specific request offerings, because the Id parameter will be different for each language.
To add language-specific navigation links:
- Navigate to the ITSM Portal folder, by default
%SYSTEMDRIVE%\inetpub\SylianceITSMPortal\ - Change directory to
\Settings\ - Open
UISettings.xmlfor editing - Create a new NavLink element inside the Navigation element, for instance:
<NavLink Id="deRo1nav">
  <UILanguage>de-DE</UILanguage>
  <LocalizedString>Create incident (DEU)</LocalizedString>
  <Href>/ServiceCatalog/CreateNewRequest?roId=cf188c3a-5f7f-edc6-3216-2a5917ac3306&srId=589e1920-4ac7-0a6e-30d2-8a0c5463d1de</Href>
</NavLink>
where:
Id – is the unique name of the navigation element. You can use this name in CSS rules (#deRo1nav in this example)
LocalizedString – string to display as navigation link -OR- string id from Resource file.
UILanguage – language code. The navigation link will be visible only for this language. You can use two- or four-letter code but it must match the code defined in languages (please refer to Language customization section)
Href – URL for this navigation link. Can be any valid URL (full or relative) - Save the file
- Refresh the page using the Ctrl-F5 key combination
How to change the header background color
The header consists of three parts:
- main background
- middle part background
- user section background

Each part of the background is filled with a repeating image of height 60px and width 1px.
To change the header background:
- Navigate to the ITSM Portal folder, by default
%SYSTEMDRIVE%\inetpub\SylianceITSMPortal\ - Change directory to
\Content\themes\base\images - Replace the
headerback.pngto change the main background (1). - Replace the
headerback2.pngto change the middle part background (2). - Replace the
headerbackright.pngto change the user section background (3). - Replace the
header-right-border.pngto change the border between the middle part (2) and the user section (3).
How to change the navigation area background
The navigation area consists of three parts:
- Main background
- Menu item background
- Hovered menu item background
To change the navigation area background follow these steps:
- Navigate to the ITSM Portal folder, by default
%SYSTEMDRIVE%\inetpub\SylianceITSMPortal\ - Change directory to
\Content\themes\base - Open main.css for editing.
- To change the main background (1)
a. Find the following string:
#navigation{
b. Change the following value:
background-color: #aeb0b1; - To change the menu item background (2)
a. Find the following string:
ul#menu li, .languageselector div.languagepicker {
b. Change the value of background for each browser-specified setting:
background: linear-gradient(bottom, #272727 0%, #474747 51%);
background: -webkit-linear-gradient(bottom, #272727 0%, #474747 51%);
background: -ms-linear-gradient(bottom, #272727 0%, #474747 51%);
background: -moz-linear-gradient(bottom, #272727 0%, #474747 51%);
Refer to the following site for more information: https://developer.mozilla.org/en-US/docs/Web/CSS/linear-gradient - To change the hovered menu item background (3)
a. Find the following string:
.languageselector div.languagepicker:hover {
b. Change the following value:
background-color: #272727;
How to hide the Create Generic Request links
To hide the Create Generic Request links from the Service Catalog:
- Navigate to the ITSM Portal folder, by default
%SYSTEMDRIVE%\inetpub\SylianceITSMPortal\ - Open
web.configfor editing.
Note: by default, this folder is protected by UAC. You must run your text editor with elevated permission (“Run as Administrator”) to edit this file. - Locate the following line (where the value depends on your initial configuration):
<add key="hideGenericRequest" value="false" /> - Change the value attribute to true.
Advanced UI Customization
Overview
The ITSM Portal is created using the latest web technologies, HTML5 and CSS3. This allows you to change almost everything in the user interface: from basic colors to the entire layout.
To make customizations simple and reusable, we implemented themes in ITSM Portal. This approach allows you to change any CSS styles without losing your modifications after a version upgrade.
If you want to change some basic settings like background color and text color only, you can use a customization.css file. This CSS file is not overwritten during an upgrade. You can use a customization.css file with your custom themes, too.
Create customization.css file
To store basic customization you can create a customization.css file. To do this:
- Navigate to the ITSM Portal folder, by default
%SYSTEMDRIVE%\inetpub\SylianceITSMPortal\ - Change directory to
\Content\themes\base - Create the file:
customization.css
Note: please check the encoding of the file. To avoid any issues it should be UTF8.
Create a new theme
Follow these steps to create a new theme based on the default theme:
- Navigate to the ITSM Portal folder, by default
%SYSTEMDRIVE%\inetpub\SylianceITSMPortal\ - Change directory to
\Content\themes - Copy and paste the base folder to the current location.
- Rename the new folder (for instance): “your company name”
Modify the new theme
Most of the UI can be customized by:
- Navigate to the ITSM Portal folder, by default
%SYSTEMDRIVE%\inetpub\SylianceITSMPortal\ - Change the directory to
\Content\themes\<your new theme> - Edit the file main.css
- Icons and images can be found in the folder
\Content\themes\<your new theme>\images
Enable the new theme
Follow these steps to enable the new theme:
- Navigate to the ITSM Portal folder, by default
%SYSTEMDRIVE%\inetpub\SylianceITSMPortal\ - Open web.config for editing.
- Find the following line:
<add key="currentTheme" value="base" /> - Change the value to the folder renamed previously
- Restart IIS
Additional theme features
The theme engine also supports custom views and custom string resources. You can create a copy of any cshtml file or resx file and add _<your new theme> postfix to the file name, then this file will be loaded instead of the standard file.
For example, if your theme is called modernui then you can rename Resource.resx and RequestsSummaryView.cshtml to Resource_modernui.resx and RequestsSummaryView_modernui.cshtml resp., and the last two files will be used instead of the standard files.
Files created this way will not be replaced or removed during future updates of ITSM Portal.
Service Catalog Customization
ITSM Portal has the ability to change the UI for the Service Catalog. You can change the entire layout of the Service Catalog view, but also you can change the layout for given Query Result prompts.
Customizing Query Result Views
The standard Query Result view is implemented as a table, and supports search, selection, details view and Selected Items view:
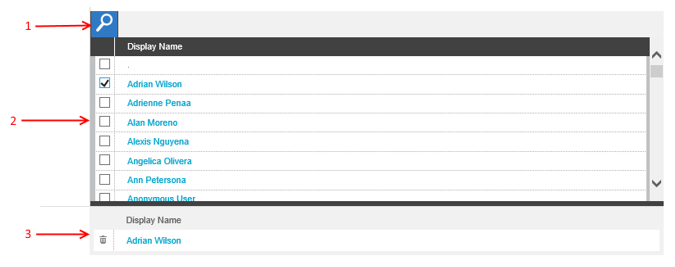
(1) – search
(2) – Data Result view
(3) – Selected Items view
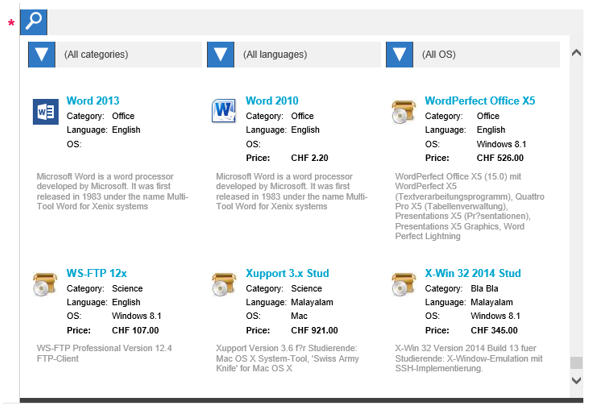
For instance, this is a custom Query Result with implemented Software Catalog UI:
By default, the Query Result prompt type displays all information as a table. To override this, you have to create a new custom view for two views:
- \Views\ServiceCatalog\InstancePickerData.cshtml
- \Views\ServiceCatalog\InstancePickerRow.cshtml
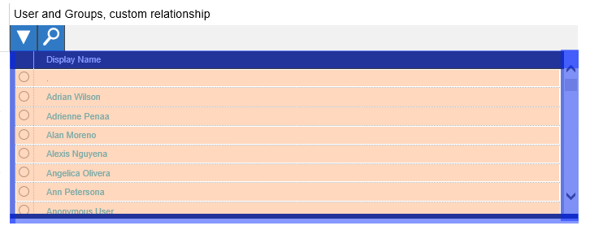
The InstancePickerData view contains the definition of the result container and enumerator for data items. The InstancePickerRow view contains the definition of the each data item. On the images below InstancePickerData is marked with blue and InstancePickerRow is marked with orange. Standard Query Result view:
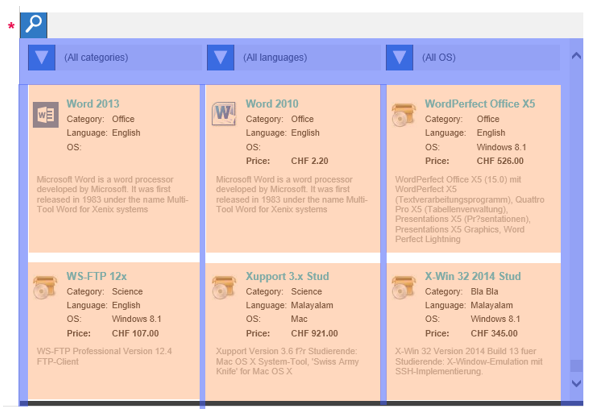
Same for some custom view:
To create a new InstancePickerData and InstancePickerRow you have to create a new file (or copy existing) and add some postfix to them, for instance InstancePickerData_catalog.cshtml and InstancePickerRow_catalog.cshtml. You will use this postfix later in the SCSM Console to configure the Query Result.
Theme name postfix
Please do not use the theme name as a postfix, because in this case custom views will be used for all Query Results.
InstancePickerData view definition
Inside InstancePickerData view you must create the following HTML elements:
| Name | Element | Required | Description |
|---|---|---|---|
| Container | Any element with attribute data-qr-container. Value of attribute can be any | Yes | This is top container for data result. |
| Header | Any element with attribute data-qr-header | No | Header of the data result. Must be inside of Container |
| Body | Any element with attribute data-qr-body | Yes | This element will contain all data items. Also it will empty when Query Result refreshed. This element must contain reference to InstancePickerRow, like this (please remember to add postfix to view name):@Html.Partial("InstancePickerRow", Model) |
This view can contain any other valid HTML or MVC components, for instance to implement “Loading…” UI or some additional filtering, data manipulation etc.
InstancePickerRow view definition
Inside InstancePickerRow view you must create the following HTML elements:
| Name | Element | Required | Description |
|---|---|---|---|
| Container | Any element with attribute data-qr-row. Value of attribute can be any | Yes | This element will be copied to “selected items” view. |
| Input | Input element. | Yes | This element used to selected item. Can be hidden. |
| Data | Any element with attributes data-name, data-type and data-value | Yes | This element will be used as data for selected answer. The data-name attribute is column name, the data-value is value (this value will be stored in UserInput XML when request submitted) |
| Data Loading | Any element with attribute data-qr-moredata | Yes | This element displayed when Query Result fetching more data from CMDB. Can be hidden. |
This view can contain any other valid HTML or MVC components.
The content of the InstancePickerRow will be copied to the Selected Items view when an item is selected.
The Input element definition
The Input element is the most important element in Query Results. This element must have the following definition:
<input type="@Model.InputType" name="@(Model.InputType + Model.Question.Ordinal.ToString())" data-isreadonly="@Model.Question.ReadOnly" data-questionid="@Model.Question.Id" data-ordinal="@Model.Question.Ordinal" value="@(curObject.GetValue<Guid>("$Id$"))" data-id="@(curObject.GetValue<Guid>("$Id$"))" data-displayname="@(curObject.GetValue<string>("DisplayName"))" data-depended="@( Model.IsDependentFromOther ? string.Join(" |", Model.DependentFrom.Select(df=> df.ToString()).ToArray()) : "")" />
You can add new attributes, but you cannot remove any predefined attributes or change them.
This element is used to detect if the current item is selected or not. The input can be of the following types:
- radio – if multiselection is disabled for Query Result (i.e. only one item can be selected)
- checkbox – if multiselection is enabled for Query Result (i.e. several items can be selected)
To select an item in the UI you can use input itself (this how it is implemented by default) or any other valid HTML technique, such as
To select or unselect an item programmatically you must change the checked property of the input element and call the change event. You can use any technique to do that, for instance JQuery:
$("#" + targetInput).prop("checked", true).change();
The Data element definition
The Data element can be any element but must contain attributes with the following definition:
data-type="@Model.Columns[i].PropertyType" data-name="@Model.Columns[i].PropertyName" data-value="@(curObject.GetValue<object>(Model.Columns[i].PropertyName))"
The data-value element can vary depending on the data type, please refer to the standard InstancePickerRow for example.
Optional attributes
You can use optional attributes data-qr-exclude and data-qr-replace.
If an element has the data-qr-exclude then this element (and all child elements) will not be copied to the Selected Items view (view below the Result View).
If an element has the data-qr-replace attribute then this element will be replaced with its own text when copied to the Selected Items view.
Configure custom Query Result view for Request Offering
To use the custom Query Result view:
- Launch the SCSM Console
- Navigate to Library\Service Catalog\Request Offerings
- Open the desired Request Offering for editing using “Edit RO for ITSM Portal”
- Scroll down to Configure Prompts section
- Select a prompt and click Advanced Configuration
- Expand Additional Configuration section
- Type the custom query result view postfix (without _), for instance:

Customizing Query Result Detail Views
By default, in the Query Result, you can view item details by clicking on the first column. The Details View is generic and displays all properties of the given item. You can define a custom Details View on a per-class base.
To create a custom Details view you must create a new view in the \Views\Shared\Forms\ folder with the file name equal to the name of the item class, for instance Microsoft.Windows.Computer.cshtml or System.User.cshtml.
Inheritance
The view engine does not support inheritance, so you must define a form for each of your derived classes, if needed
You can use any valid HTML or MVC elements in this view. The only required element must have the id attribute with displayNameValue value:
id="displayNameValue"
The inner text of this element will be used as the title for the Details view. The element can be hidden. Please refer to GenericObjectForm.cshtml as an example.