User Guide
Introduction
itnetX Send Mail for System Center Service Manager (SCSM) is targeted at console users (analysts) responsible for managing the lifecycle of Incidents, Service Requests, and other Work Items. The out-of-the-box functionality of SCSM to send email requires you to have an email client installed on the computer you invoke the action on.
itnetX Send Mail for System Center Service Manager uses a console task based form to achieve the same functionality and extends the capabilities through a class extension. You must have the SMTP notification channel configured. Additionally, you must have either the standard incoming mail options or the Exchange Connector configured to process incoming replies. This guide provides the usage steps for the solution.
itnetX Send Mail for SCSM is available as a Free and Pro edition. Not all features described in this document are available in both versions of the product. Please refer to the Installation Guide for more information.
Send Mail Usage
To send email messages using itnetX Send Mail for System Center Service Manager:
- Open the SCSM console.
- Select the work item for which you want to send an email message.
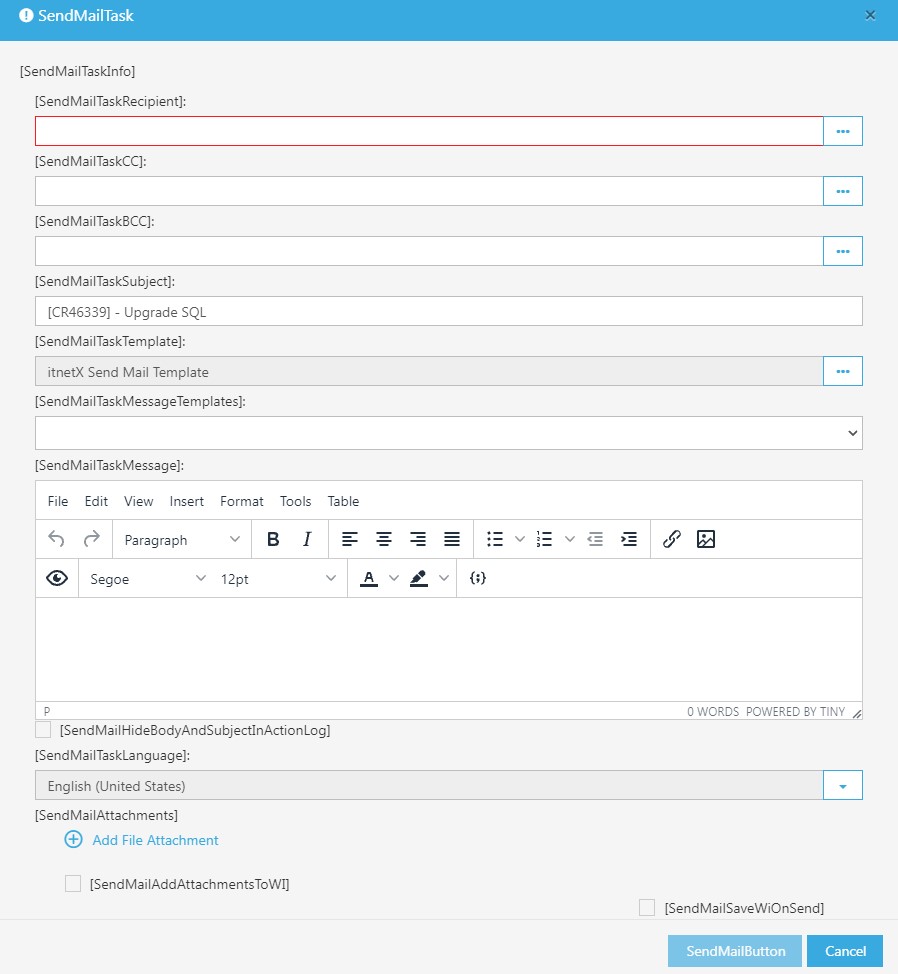
- Click Send Mail task
The task is available from both Work Item views and forms
Note: The BCC field can be hidden by your administrator - By default, the cursor is focused on the Comment field.
- You can change the subject text if required.
Note: If you have configured the Exchange Connector in SCSM to receive incoming emails you are required to use square brackets (“[“, “]”) around the work item ID. - Select a notification template to be used to send the email. You can ask your administrator to add more templates to this list if needed.
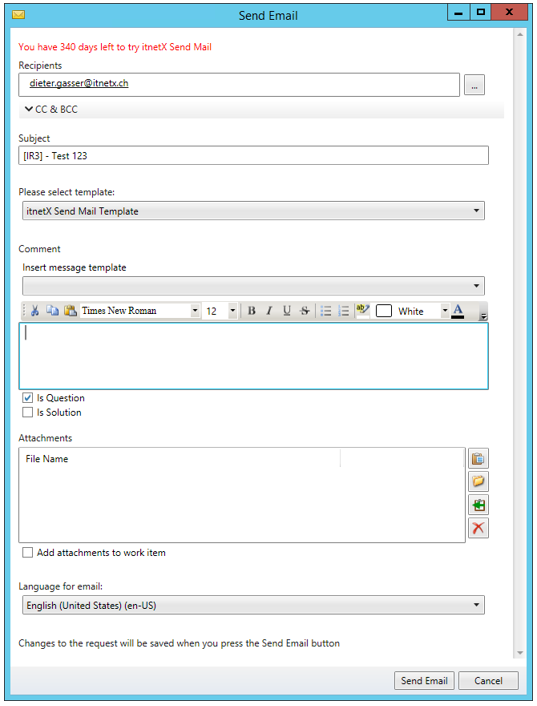
- Enter comments in the Comment field. This text will be added to the body of the email. You can use any text-formatting, or paste any RTF- or HTML-formatted content (e.g. from MS Word) and images.
- Optionally, you can use a message template. When selected, the text from the template will be put into the comment field and you can change it as needed. Ask your administrator if you need more message templates to be added to the list.
- For incidents, you can set the Is Question option. If set, the status of the incident will be changed to “Pending”. This option is only available for open incidents.
- For incidents and service requests, you can set the Is Solution option. If set, you must provide a resolution description and the status of the request will be changed to “Resolved” or “Completed” respectively.
- If you want to add attachments, you can use three options:
a. Paste from clipboard: Using Paste from clipboard you can paste image data (screenshots, copy from image editors etc.) and files (copy files in Windows Explorer and paste then as attachments). Image data will be converted to PNG file format.
b. Browse for files: Using Browse for files you can browse for files and add them to the email message. c. Add from work item: You can add existing attachments from the work item to your email message using the Copy existing attachment from work item button.
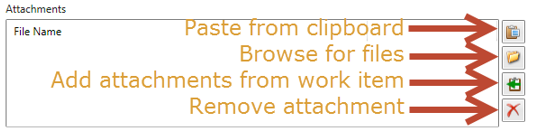
You can view an added attachment by double-clicking it in the Attachments list. Select an attachment from the list and click Remove attachment to remove the it from the list. - Optionally, you can add the attachments to the work item by checking Add attachments to work item. If not checked, the attachments will only be available in the email.
- Check the Language for email field and change it to the desired language, if necessary. The available languages depend on the selected template.
- By default, the recipient’s email address is populated from the Affected User or the Alternate Contact Method. If you want to change the address or add recipients, you can do it in two ways:
a. Change delivery address manually:
Just type the full email address in recipient, cc and bcc fields respectively. Separate multiple recipients in the same field with semicolons (“;”).
Note: you can type any address, but only addresses from the CMDB will be used for auto-completion. Typed addresses will be represented as objects after a couple of seconds.
b. Select users from CMDB:
Click the picker button on the right hand side of the recipient field (“…”) and search by part of Display Name, First Name, Last Name or User Name. - Click Send Email to add the notification to the queue.
Please note: the work item object will be saved, i.e. any changes made in the work item form before executing the Send Mail task will be committed to the database.
Using Send Mail in the itnetX ITSM Analyst Portal
Send Mail is also available in the itnetX ITSM Analyst Portal. You can access the Send Mail dialog from the task list on the right hand side.
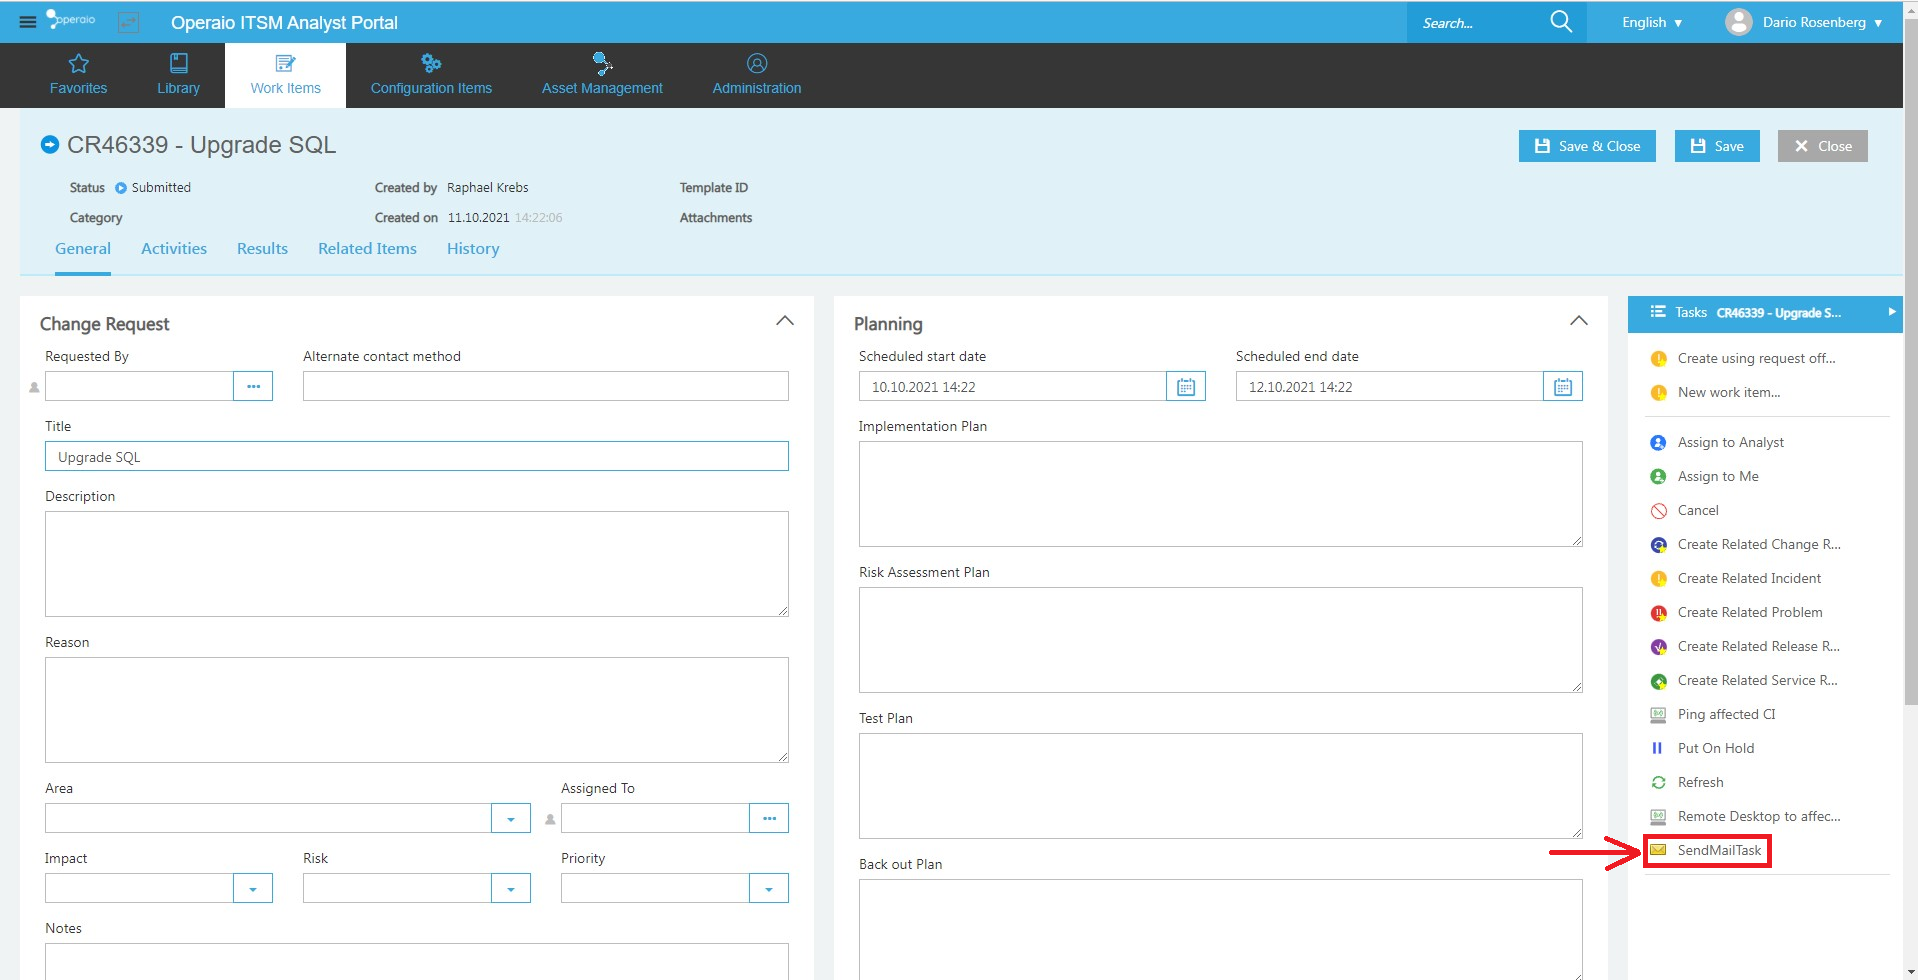
Please note that only a subset of the features is exposed when you use Send Mail with the Analyst Portal.